Getting Started Guide
Basic Navigation of the Platform
From logging in for the first time to the core tools you’ll rely on every day, your dashboard, contacts, calendars, forms, funnels, payments, automations, memberships, and the mobile app.
Explore the Guide
This guide walks you through the essential navigation of the Go Online Now — Connect CRM platform. Each section below breaks a feature area into simple, step-by-step instructions. Need a deeper walkthrough on any topic? Video tutorials for each section are available in your Go Online Now resource library, or reach out on Slack for direct support.
01 Logging In to Your Account
Sign in securely and verify your account with a one-time email security code.
- Open your browser and go to app.goonlinenow.co.
- Enter your registered email address and password on the login page.
- Klik Sign In.
- Klik Send Security Code to receive a one-time verification code by email.
- Open the email containing your security code.
- Copy the code and enter it on the verification screen.
- Once verified, you’ll land on your Go Online Now Connect CRM dashboard, ready to manage your business.
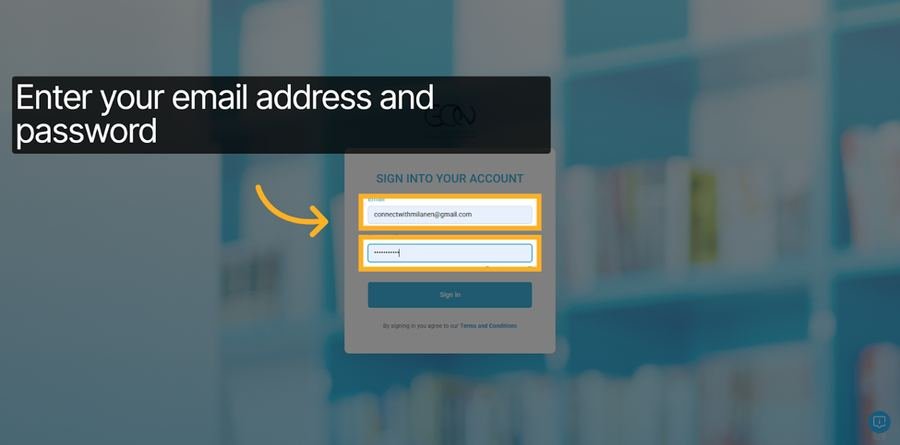
Enter your email address and password to sign in.
Tip: Keep your email inbox handy during login, the security code is time-sensitive.
02 Launchpad & Dashboard Overview
Your home base after logging in, connect business tools and monitor performance at a glance.
- Launchpad is the first screen after login, offering quick-setup options for your core business tools.
- Download the mobile app (iOS or Android) to manage your business on the go.
- Connect Google Bedrijfsprofiel, Facebook Messenger, WhatsApp, and a webchat widget to sync leads and conversations.
- Connect a payment account (e.g., Stripe) to start accepting payments and managing invoices.
- Add team members directly from the Launchpad.
- Switch to the Dashboard for a full performance overview: adjust the date range, filter by pipeline, and review Opportunity Status, Total Opportunity Value, and Conversion metrics.
- Use the Funnel visualization En Stage Distribution charts to see how leads move through your sales process and spot bottlenecks.
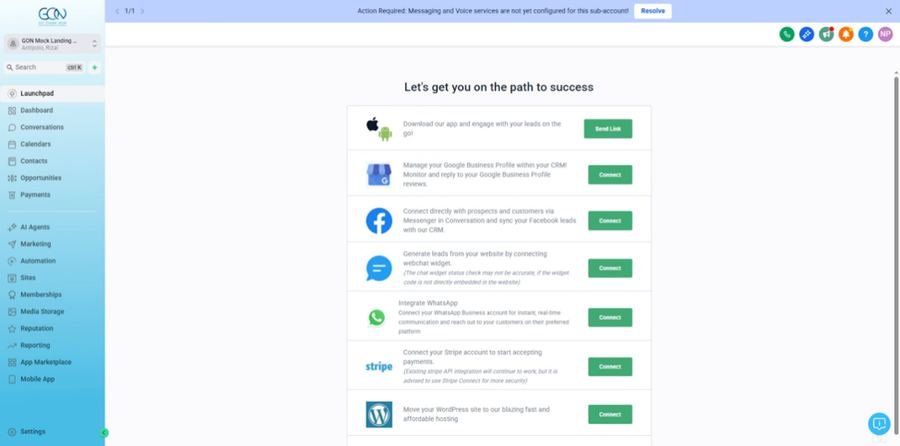
The Launchpad, connect your apps, tools, and team in one place.
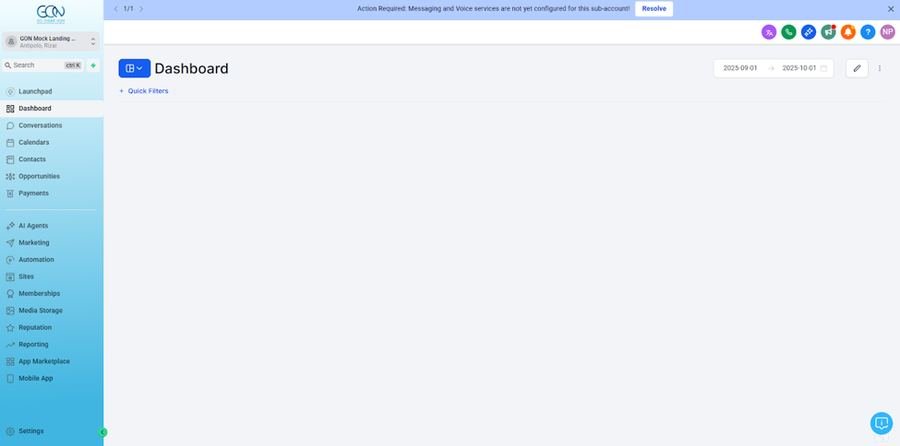
The Dashboard, accessible from the left-hand navigation menu.
Tip: All dashboard charts update in real time as you add contacts, close deals, and move opportunities through your pipeline.
03 Conversations & Calendars
Manage every customer message and appointment from one unified inbox and scheduling system.
- Open Conversations from the left menu to see a unified inbox of emails, texts, Facebook messages, and more.
- Use the Conversation, Manual Actions, En Snippets tabs to organize threads, tasks, and message templates.
- Filter messages by Read, Starred, or All, or use the search bar to find a specific contact.
- Click the plus (+) icon to start a new conversation with a contact.
- Open Kalenders to manage bookings, toggle between Calendar View and Appointment List View.
- Switch between day, week, or month views, and click any open time slot to book a new appointment.
- In Calendar Settings, set working hours, buffer times, and automatic email/SMS reminders to reduce no-shows.
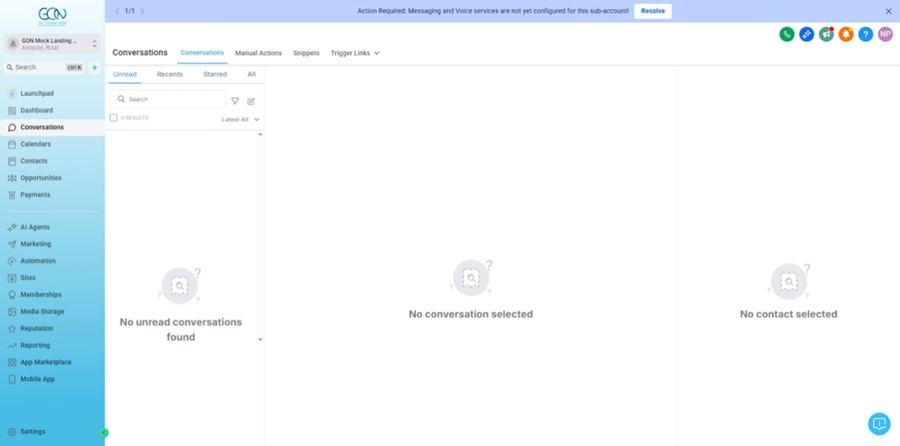
Conversations, your unified inbox for all customer messages.
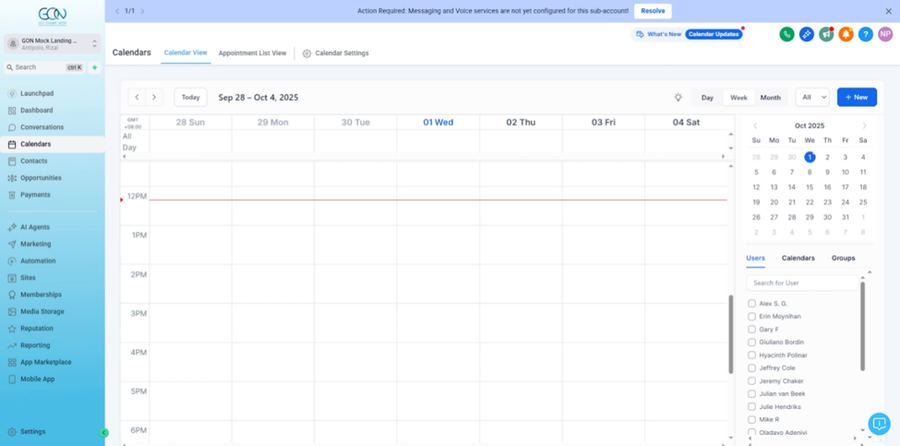
Calendar View, see and manage all appointments visually by day, week, or month.
Tip: Appointments booked through your public booking page appear on your calendar automatically.
04 Contacts & Opportunities
Your customer database and sales pipeline tracker, side by side.
- Open Contacts to view your full customer database, with columns for Name, Phone, Email, Created Date, Last Activity, and Tags.
- Click the plus (+) icon to add a new contact, or use Smart Lists, Bulk Actions, and filters to organize existing ones.
- Click any contact’s name to open their full profile, conversation history, appointments, opportunities, notes, and custom fields.
- Gebruik Tags to segment contacts by category, source, or status.
- Open Mogelijkheden to see your visual sales pipeline board; switch pipelines using the dropdown at the top.
- Each pipeline stage (e.g., Possible Clients, Booked Appointments, Follow-Up Appointments) shows the number and total value of opportunities in it.
- Drag and drop opportunity cards between stages as deals progress, and use Advanced Filters of Sort to organize by value, date, or contact.
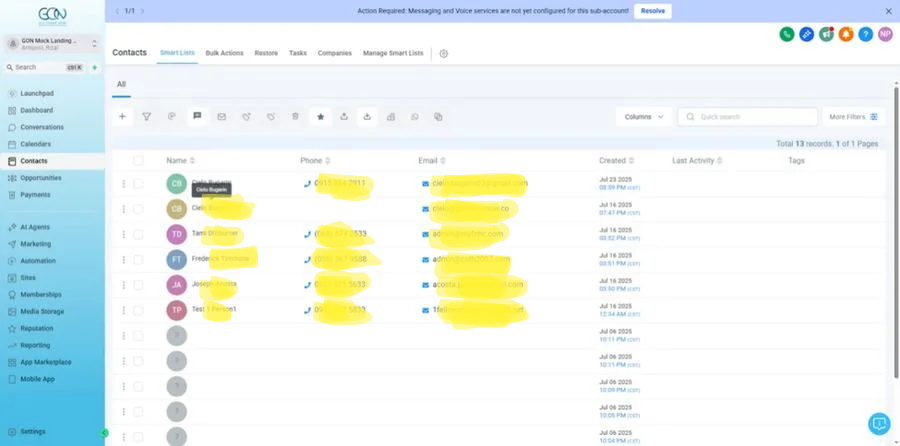
The Contacts view, your full customer database with Smart Lists and quick filters.
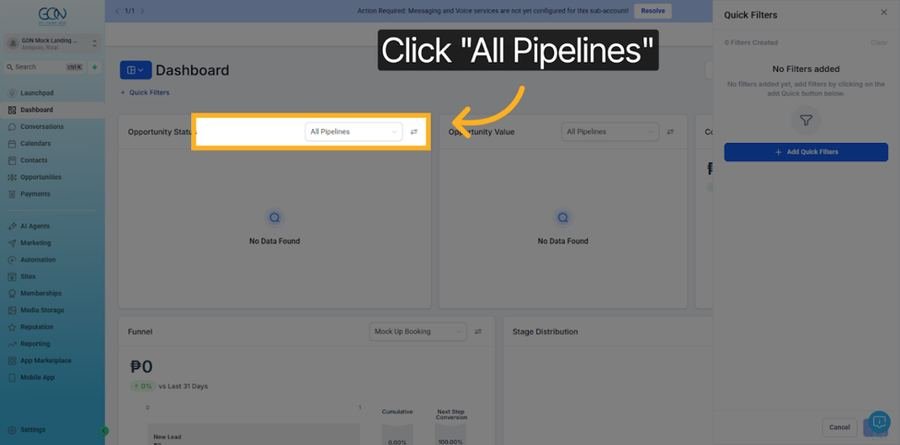
Use the “All Pipelines” dropdown to switch between pipelines.
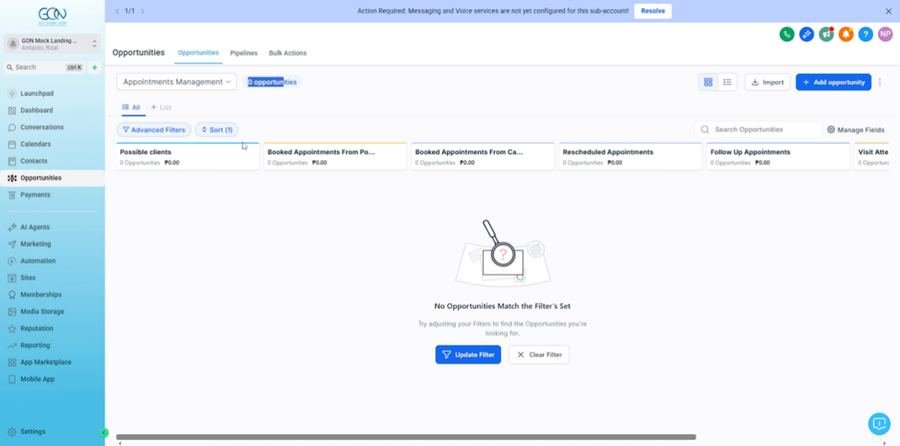
The Opportunities board, track deals across each pipeline stage.
Tip: Keep the Contacts section updated and tagged consistently — it powers your automations and Smart Lists.
05 Forms & Custom Fields
Build lead-capture forms and the custom data fields that power them.
- Go to
Sites → Formsand click + Create New Form to start a new form, or choose a ready-made Contact Form template. - Drag and drop fields such as Full Name, Email, Phone Number, and Message into your form, and reorder them as needed.
- Add Custom Fields for any unique data your business needs to collect.
- Under Styles, adjust background, text color, spacing, and toggle Full Width for a responsive layout.
- Under Settings, choose what happens after submission, a Thank You message, a redirect, or a triggered workflow/automation.
- Klik Save Form, then click Integrate Form to get the embed code for your website or funnel.
- To create the underlying data fields: go to
Settings → Custom Fields → Add Field, choose an input type (Text, Dropdown, Date, etc.), and assign it to either Contact of Opportunity — this cannot be changed later.
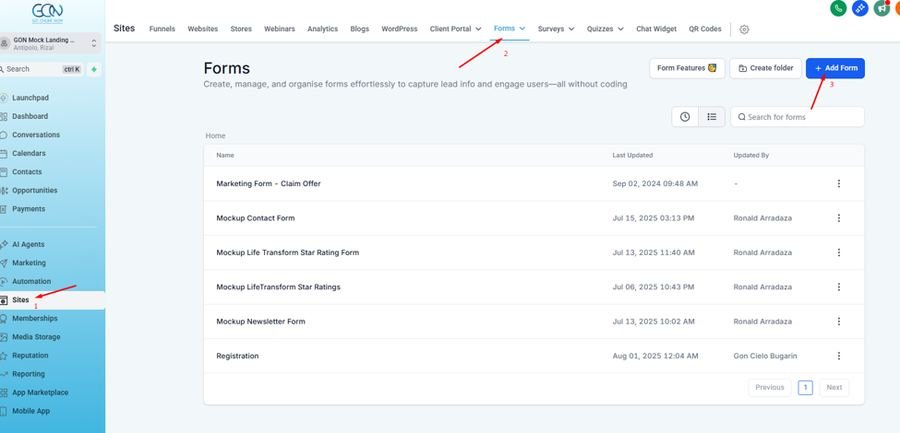
Sites → Forms — view, search, and create all your forms here.
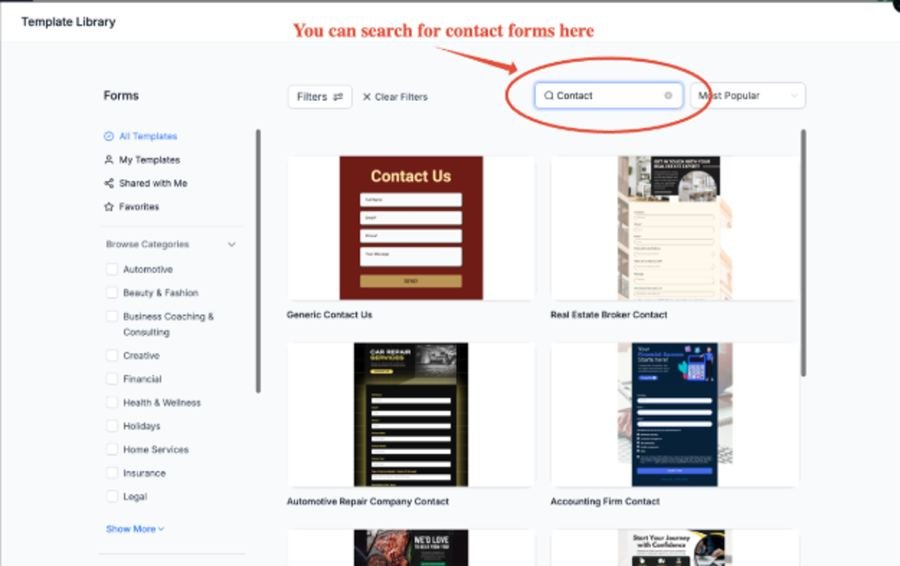
Search the Template Library for a ready-made Contact Form.
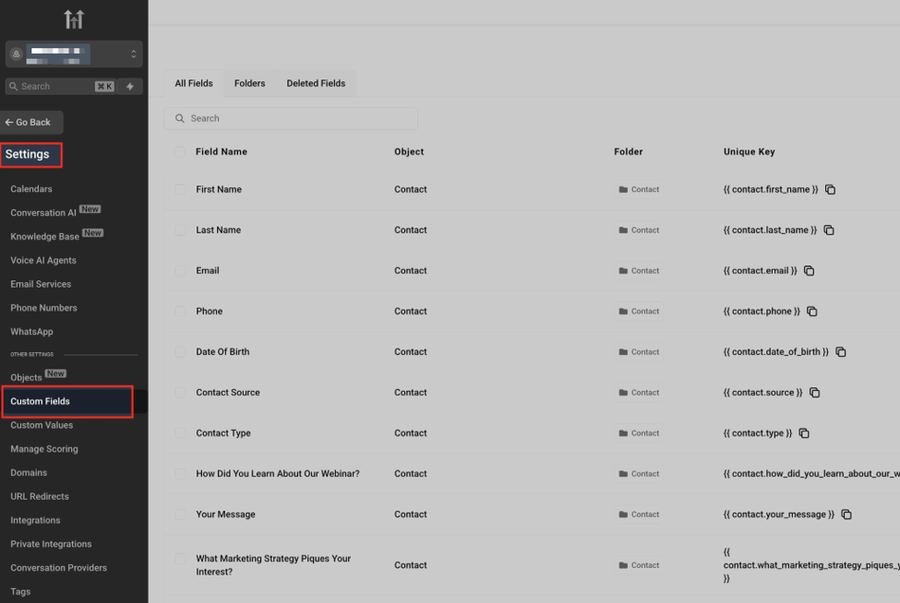
Settings → Custom Fields — view and manage all your data fields.
Tip: Group related custom fields into folders (Settings → Custom Fields → + Add Folder) to keep contact and opportunity records tidy.
Settings → Custom Fields → + Add Folder) to keep contact and opportunity records tidy.
06Funnels & Sites
Build landing pages, funnels, and other digital assets without a developer.
- Go to
Sites → Funnelsand click New Funnel to choose From Blank, Funnel AI, or From a Template. - For a template: open the Template Library, search and preview options, click Continue, then customize it in the Funnel Editor.
- Add a lead-capture form to any funnel step via the Form Picker in the Funnel Editor, or build one in the Form Builder.
- To edit an existing funnel, go to
Sites → Funnels, select it from the list, make changes, and click Save. - Connect a custom domain under
Settings → Domains → Connect a Domain, then follow the DNS setup instructions and click Verify Records. - Beyond Funnels, the Sites tab also includes Websites, Stores (e-commerce), Webinars, Analytics, Blogs, WordPress, Client Portal, Forms, Surveys, Quizzes, and QR Code generation.
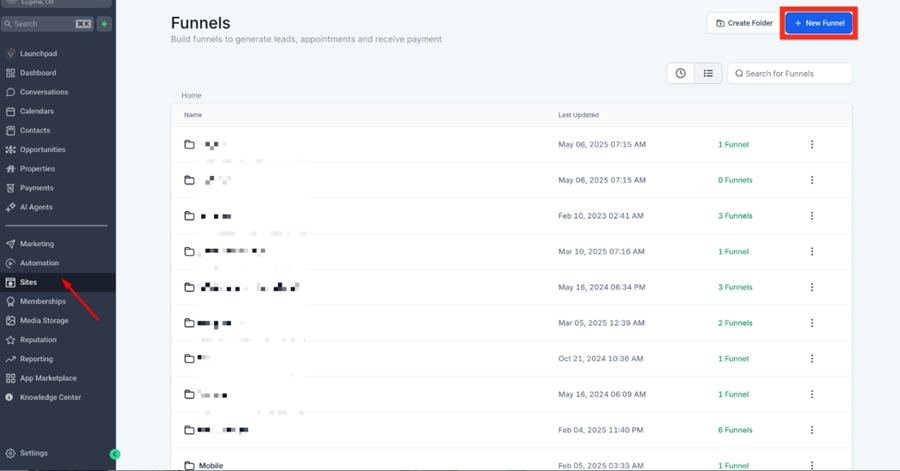
Sites → Funnels, click + New Funnel to start building.
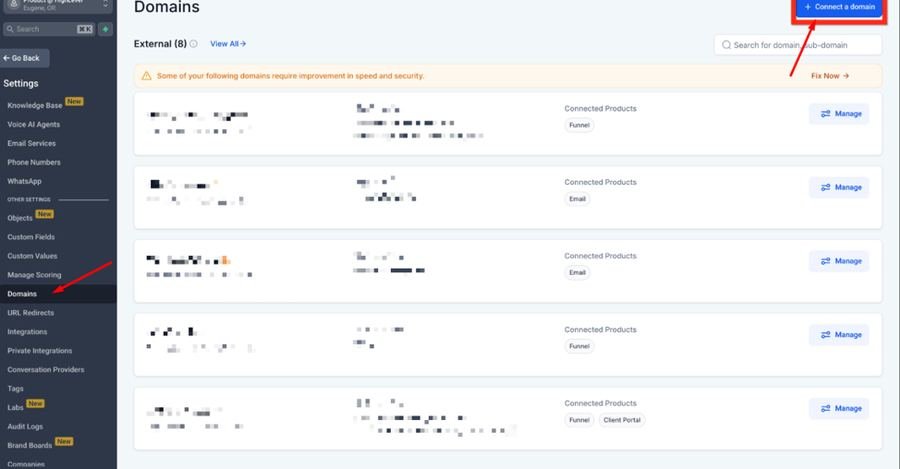
Settings → Domains, connect a custom domain to your funnel.
Tip: Each funnel step is a chance to guide a visitor closer to taking action — landing page, thank-you page, booking page, and payment page can all work together in one funnel.
07Payments & Invoices
Your hub for invoicing, tracking payments, and managing financial transactions.
- Open Payments from the left menu to reach your invoicing and payment dashboard.
- Review the Invoices overview for key metrics such as total invoiced amount and status breakdown.
- Before receiving payments, connect a payment gateway (e.g., PayPal or another processor) via Integrate Payment Directly.
- Use Start Date / End Date filters, the search bar, and status/customer/amount filters to find specific invoices.
- Review the invoice table for name, number, customer, issue date, and amount, and check each invoice’s status (paid, pending, or overdue).
- Send invoices via email so customers can pay online directly through your connected gateway.
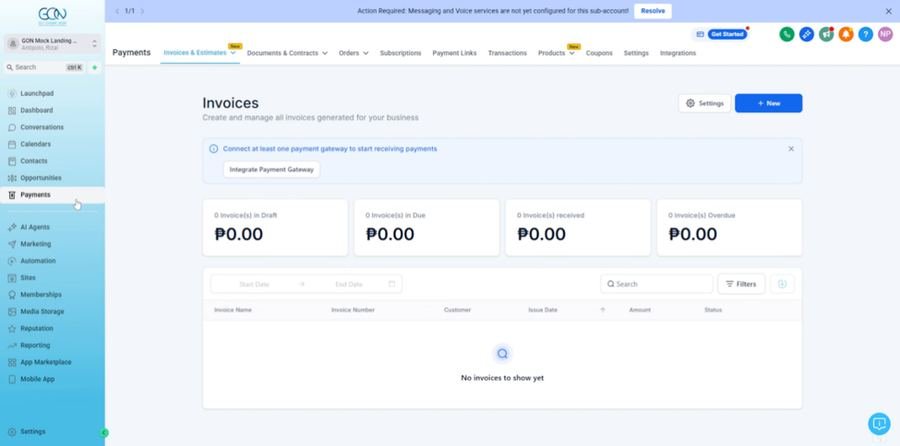
The Invoices dashboard under Payments, track draft, due, received, and overdue invoices.
Tip: Explore the Products, Subscriptions, and Payment Links tabs alongside Invoices for recurring billing and one-off checkout links.
08Automation Workflows
Set up hands-free follow-ups and reminders that run automatically.
- Open Automatisering from the left menu to access your Workflows list and Global Workflow Settings.
- Browse All Workflows, those Needing Review, of Deleted workflows using the tabs at the top.
- Workflows are organized into folders by purpose (e.g., Workflows for Appointments).
- A workflow’s status shows whether it’s a Draft (still being built) or Active.
- Click any workflow to edit its triggers, actions, and conditions.
- Typical uses include sending welcome emails, appointment reminders, lead follow-ups, and auto-tagging contacts based on behavior.
Tip: Think of each workflow as a virtual assistant that runs 24/7 — it never forgets to follow up on time.
09Memberships & Media Storage
Host courses and communities, and manage all your business media in one library.
- Open Memberships to manage online courses, member communities, and the Client Portal.
- Gebruik Courses to build and organize lesson content, and Gemeenschappen to create member discussion areas.
- Klik Credentials to manage member certificates and achievements.
- Share your unique Client Portal URL so members can log in to access courses, communities, and affiliate payouts.
- Open Media Storage to access your centralized file library for images, videos, and documents.
- Connect Google Drive or use Upload to add new files; use Grid View and sorting options to browse them.
- Create folders to organize files by project, client, or content type.
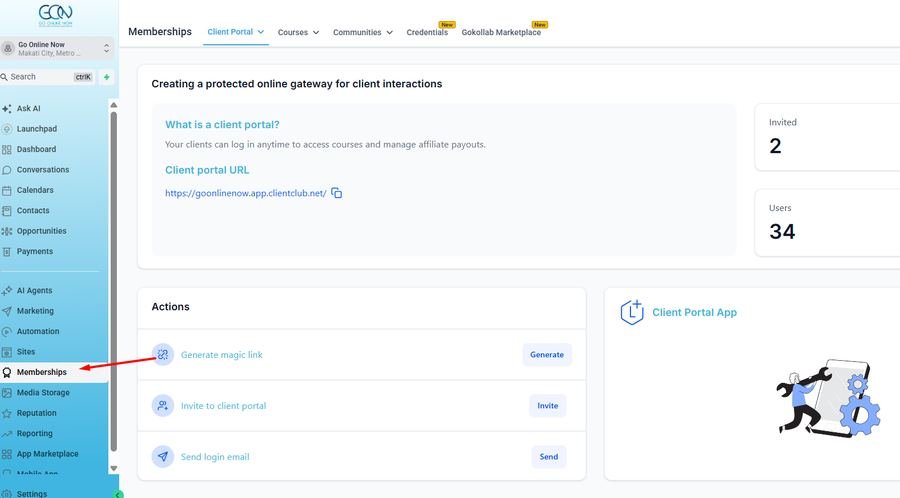
Memberships → Client Portal, generate magic links, invite clients, and view portal stats.
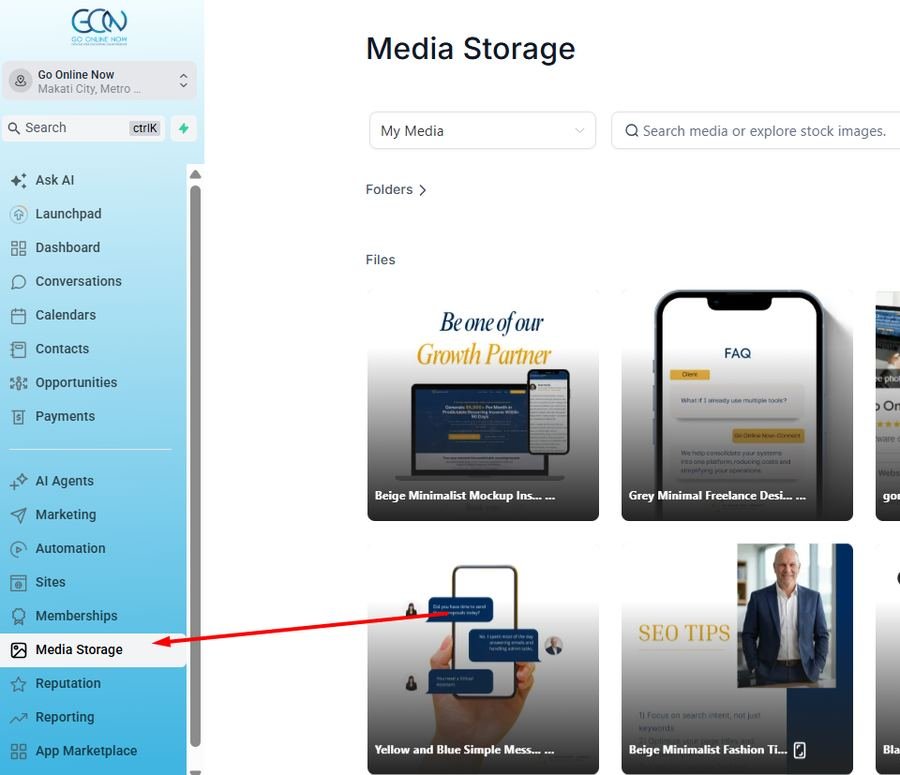
Media Storage, your central library for images, videos, and business files.
Tip: Memberships work well for coaches, consultants, and course creators looking to build recurring revenue.
10App Marketplace & Mobile App
Extend the platform with integrations and stay connected from your phone.
- Open App Marketplace from the left menu to browse over 1,000 available integrations.
- Gebruik Installed Apps to review what’s already connected, or All Apps to browse everything available.
- Filter by Collections, Categories, App Contains, Business Niche, Built By, or Pricing to find the right tool.
- Click an app to view details, read reviews, and check compatibility before installing.
- Open Mobiele app in the left menu to download the LeadConnector mobile app from the Apple App Store or Google Play Store.
- Gebruik Invite Users to Download App to automatically or manually send the download link to your team.
- The mobile app gives full access to Conversations, Calendar, Contacts, and Opportunities from your phone.
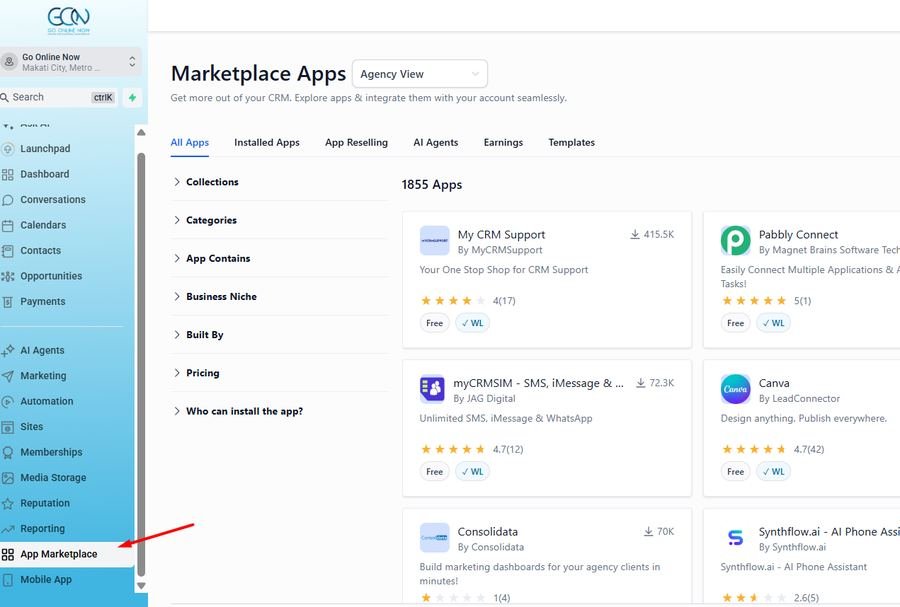
App Marketplace, browse, filter, and install from 1,800+ integrations.
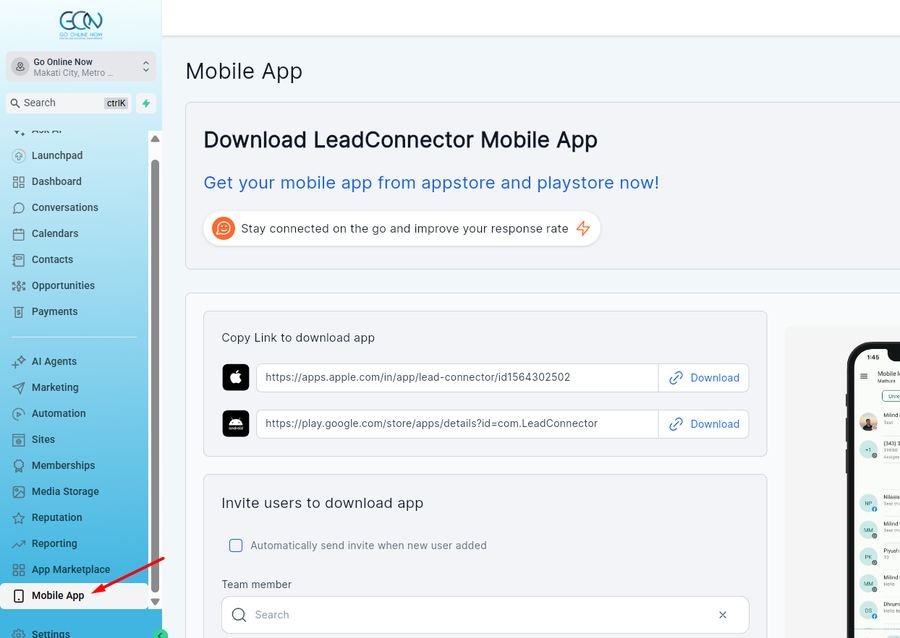
Mobile App, download links and team invites for the LeadConnector app.